注意: 由于国内网络的原因,Telegram bot 开发时需要全程开启梯子,并选择全局代理模式!!!
创建一个新Bot
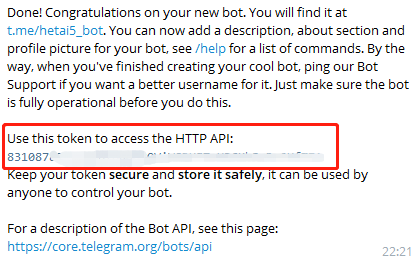
在Telegram客户端搜索@BotFather,然后按照步骤创建一个属于自己的bot。创建成功后,BotFather会返回给你一个Token:
比如我创建了一个叫hetai5_bot的bot,现在在客户端,我们@hetai5_bot进行任何对话,bot并不会进行响应:
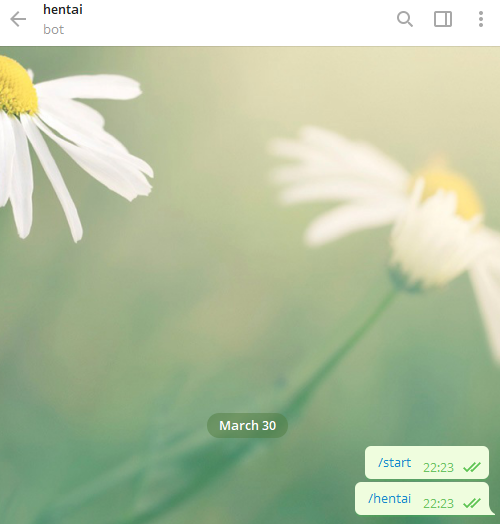
我们需要在本地编写逻辑,才能响应用户的各种输入
实现交互
新建一个项目文件夹mkdir bot,npm init -y 然后安装依赖npm i node-telegram-bot-api
新建一个index.js
const TelegramBot = require('node-telegram-bot-api');

const token = '填入你的token';
const bot = new TelegramBot(token, {
  polling: true
});


bot.onText(/\/hentai/, function onLoveText(msg) {
  bot.sendMessage(msg.chat.id, 'Are you a hetai?');
});


bot.onText(/\/echo (.+)/, (msg, match) => {

  const chatId = msg.chat.id;
  const resp = match[1];
  bot.sendMessage(chatId, resp);
});然后node index.js启动文件,这样就成功了吗?
很可惜,如果你是在国内开发,这样并没有卵用。虽然我们全程开启了ss(ssr)梯子,但是ss和vpn不同,ss即使开启了全局模式,它也不会代理电脑的所有网络。浏览器默认会自动走ss的代理服务器,但是其他软件默认并不会走ss代理,因此我们node index.js启动程序后, 并不能成功连接到Telegram
因此我们需要在代码里手动加上代理,走ss代理服务器!
npm i socks5-https-client
修改代码:
const TelegramBot = require('node-telegram-bot-api');
const Agent = require('socks5-https-client/lib/Agent');

const token = '填入你的token';
const bot = new TelegramBot(token, {
  polling: true,
  request: { // 设置代理
    agentClass: Agent,
    agentOptions: {
      socksPassword: '填入你登梯子时的密码'
    }
  }
});

// 匹配/hentai
bot.onText(/\/hentai/, function onLoveText(msg) {
  bot.sendMessage(msg.chat.id, 'Are you a hetai?');
});


// 匹配/echo
bot.onText(/\/echo (.+)/, (msg, match) => {

  const chatId = msg.chat.id;
  const resp = match[1];
  bot.sendMessage(chatId, resp);
});
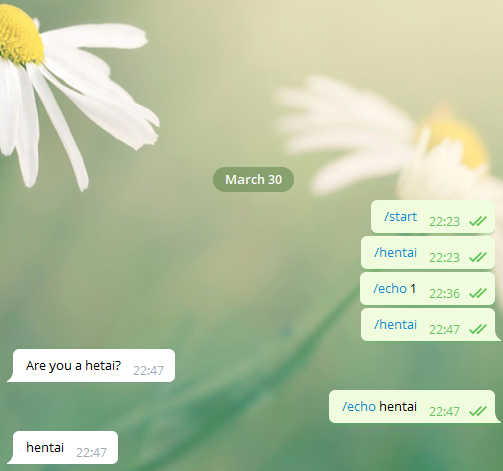
这次再和bot对话,就实现了对话功能了!
当然我们可以再加点功能,比如用户输入/prpr,就从网上找一张图片发给用户
npm i request
const TelegramBot = require('node-telegram-bot-api');
const Agent = require('socks5-https-client/lib/Agent');
const request = require('request');

const token = '填入你的token';
const bot = new TelegramBot(token, {
  polling: true,
  request: { // 设置代理
    agentClass: Agent,
    agentOptions: {
      socksPassword: '填入你登梯子时的密码'
    }
  }
});


bot.onText(/\/hentai/, function onLoveText(msg) {
  bot.sendMessage(msg.chat.id, 'Are you a hetai?');
});

bot.onText(/\/prpr/, function onLoveText(msg) {
  const chatId = msg.chat.id;
  request('https://konachan.com/post.json?tags=ass&limit=50', function (error, response, body) {
    if (!error && response.statusCode == 200) {
      const result = JSON.parse(body) || [];
      const index = parseInt(Math.random() * result.length);
      bot.sendPhoto(chatId, result[index].file_url, { caption: '手冲一时爽,一直手冲一直爽' }).catch((err) => {
        bot.sendMessage(chatId, '手冲失败');
      })
    } else {
      bot.sendMessage(chatId, '手冲失败');
    }
  });
});


bot.onText(/\/echo (.+)/, (msg, match) => {

  const chatId = msg.chat.id;
  const resp = match[1];
  bot.sendMessage(chatId, resp);
});

polling VS webhook
我们开发的bot是怎么知道用户发送了哪些命令?
Telegram bot有两种获取用户发送命令的方式,一种是polling模式,也就是轮询。我们的bot需要每隔一段时间,就向Telegram服务器发送请求,询问最近用户发过来了哪些命令。这种方式的好处就是便于在本地调试,我们刚才的代码使用的就是这种模式。坏处就是每隔一段时间就要主动发送请求,即使最近可能没有任何用户发送命令。
另外一种模式就是webhook,我们需要给bot设置一个webhook地址,比如说https://hentai.com/bot123。这样,每次当用户向bot输入命令时,Telegram就会把这次的命令转发到https://hentai.com/bot123,因此,我们需要在https://hentai.com/bot123部署我们的bot。这种模式的好处就是可以及时响应用户的命令,坏处就是本地调试麻烦,可能需要ngrock这种内网穿透工具。同时在线上部署时,我们还需要有自己的域名并且要支持https!!!
线上部署
首先,我们需要有一台国外服务器:推荐在搬瓦工或者vultr上购买VPS。同时,你需要有一些简单的linux基础知识,如果你完全不会,推荐你看下我之前写过的一篇文章写给前端小白看的linux部署基础知识
我这里购买的是vultr的VPS($5/mo的套餐),安装的操作系统是centos 7 X64
因为我们使用了国外的服务器,所以代码里面的http代理可以去掉了:
const TelegramBot = require('node-telegram-bot-api');
const request = require('request');

const token = '你的token';
const bot = new TelegramBot(token, {
  polling: true
});

bot.onText(/\/hentai/, function onLoveText(msg) {
  bot.sendMessage(msg.chat.id, 'Are you a hetai?');
});

bot.onText(/\/prpr/, function onLoveText(msg) {
  const chatId = msg.chat.id;
  request('https://konachan.com/post.json?tags=ass&limit=50', function (error, response, body) {
    if (!error && response.statusCode == 200) {
      const result = JSON.parse(body) || [];
      const index = parseInt(Math.random() * result.length);
      bot.sendPhoto(chatId, result[index].file_url, { caption: '手冲一时爽,一直手冲一直爽' }).catch((err) => {
        bot.sendMessage(chatId, '手冲失败');
      })
    } else {
      bot.sendMessage(chatId, '手冲失败');
    }
  });
});

bot.onText(/\/echo (.+)/, (msg, match) => {
  const chatId = msg.chat.id;
  const resp = match[1];
  bot.sendMessage(chatId, resp);
});
安装基础组件,nvm,node,pm2
yum -y install gcc gcc-c++ autoconf pcre-devel make automake
yum -y install wget httpd-tools vim
curl -o- https://raw.githubusercontent.com/creationix/nvm/v0.34.0/install.sh | bashnvm install 11.0.0npm i pm2 -g把本地项目上传到服务器后,直接运行pm2 start index.js --name bot即可
域名支持https
前面我们说过了,polling模式的坏处就是浪费资源,而且不能及时响应用户请求
webhook模式下,部署比较麻烦,如果不希望使用这种方法,可以忽略下文
使用webhook的前提是我们有一个自定义域名,同时需要把域名指向我们的vps
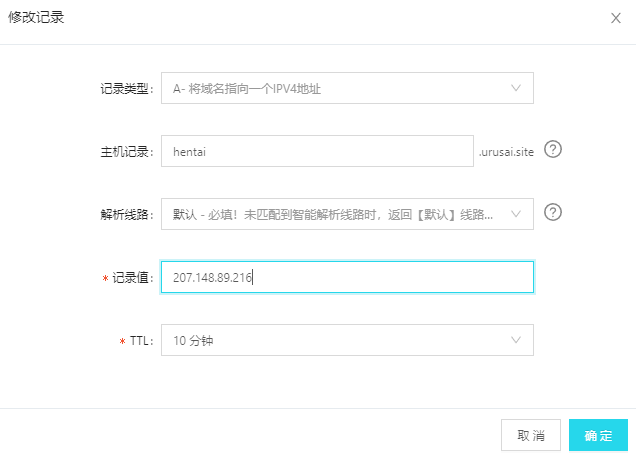
如图,我把一个子域名hentai.urusai.site指向我当前的vps IP地址
安装nginx
vim /etc/yum.repos.d/nginx.repo写入:
[nginx]
name=nginx repo
baseurl=http://nginx.org/packages/centos/7/$basearch/
gpgcheck=0
enabled=1:wq!保存退出
yum install nginx这样就安装了最新版本的nginx
设置防火墙规则:
firewall-cmd --add-service=http
firewall-cmd --add-service=https
firewall-cmd --runtime-to-permanent
修改nginx配置:
vim /etc/nginx/conf.d/default.conf把server_name localhost;修改成域名hentai.urusai.site即可
完成后,开启nginx:
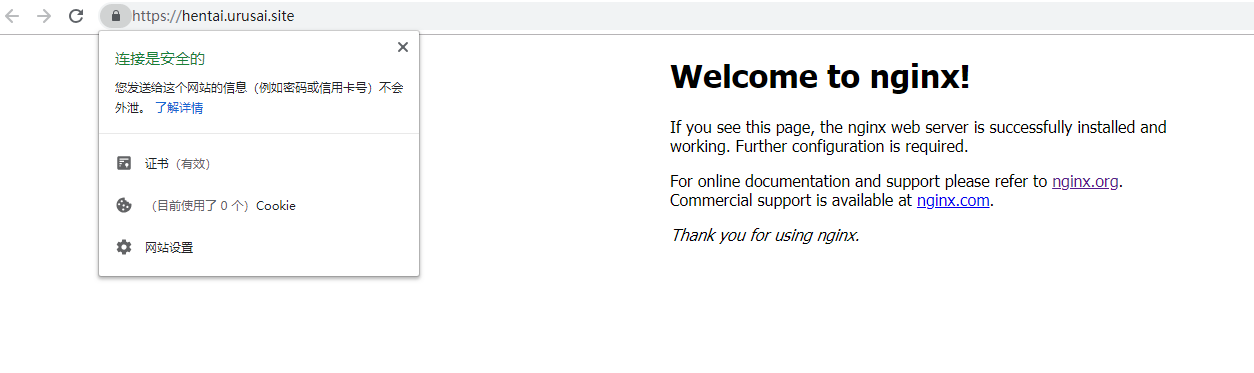
nginx -s reload浏览器输入http://hentai.urusai.site,就应该有nginx欢迎页面了
现在我们需要支持https:
安装certbot
yum install epel-release
yum install certbot-nginx
获取SSL证书
certbot --nginx成功完成之后,我们访问https://hentai.urusai.site就可以正常请求了!
设置证书自动续期 certbot颁发的证书,默认只有3个月有效期,因此我们可以设置自动续期 每天早上5:15执行任务
crontab -e输入
15 5 * * * certbot renew --quiet强制更新证书
certbot renew --force-renewnginx配置webhook
Telegram bot使用webhook模式时,我们需要修改现有的代码:
npm i express body-parserconst TelegramBot = require('node-telegram-bot-api');
const express = require('express');
const bodyParser = require('body-parser');
const request = require('request');
const TOKEN = '你的token';
const url = 'https://hentai.urusai.site'; // 你自己的域名
const port = 9000;
const bot = new TelegramBot(TOKEN);
bot.setWebHook(`${url}/bot${TOKEN}`);
const app = express();
app.use(bodyParser.json());
app.get('/', (req, res) => res.send('Hello World!'));
app.post(`/bot${TOKEN}`, (req, res) => {
bot.processUpdate(req.body);
res.sendStatus(200);
});
app.listen(port, () => {
console.log(`Express server is listening on ${port}`);
});
bot.onText(/\/hentai/, function onLoveText(msg) {
bot.sendMessage(msg.chat.id, 'Are you a hetai?');
});
bot.onText(/\/prpr/, function onLoveText(msg) {
const chatId = msg.chat.id;
request('https://konachan.com/post.json?tags=ass&limit=50', function (error, response, body) {
if (!error && response.statusCode == 200) {
const result = JSON.parse(body) || [];
const index = parseInt(Math.random() * result.length);
bot.sendPhoto(chatId, result[index].file_url, { caption: '手冲一时爽,一直手冲一直爽' }).catch((err) => {
bot.sendMessage(chatId, '手冲失败');
})
} else {
bot.sendMessage(chatId, '手冲失败');
}
});
});
bot.onText(/\/echo (.+)/, (msg, match) => {
const chatId = msg.chat.id;
const resp = match[1];
bot.sendMessage(chatId, resp);
});然后重新启动pm2
pm2 restart bot修改nginx配置
vim /etc/nginx/conf.d/default.conf把https://hentai.urusai.site转发到我们刚才express启动的服务器上
location / {
    proxy_pass http://127.0.0.1:9000;
    proxy_http_version 1.1;
    proxy_set_header X_FORWARDED_PROTO https;
    proxy_set_header X-Real-IP $remote_addr;
    proxy_set_header X-Forwarded-For $remote_addr;
    proxy_set_header X-Forwarded-For $proxy_add_x_forwarded_for;
    proxy_set_header Host $host;

}
nginx -s reload重启nginx成功后,访问https://hentai.urusai.site/应该就展示express服务器返回的hello world
同时,我们Telegram bot的webhook模式也设置成功了
再次访问bot,输入/prpr,依然可以手冲了
bot定时发送消息
bot除了当用户输入命令时,我们做出相应的操作,我们也可以定时让bot向特定的渠道发送消息
比如我们可以创建一个channel,然后邀请bot成为管理员,让bot每天10点发送一条天气预报,这样所有订阅了这个channel的用户,都可以收到消息了!
最后
最近我也做了一个Telegram Bot,用于抓取yande.re上面的图片
![]()
机器人bot

Telegram搜索@yande5_bot或者点击这里yande5_bot
使用方法:
- /start 开始使用
- /latest 3 获取最新3张图片
- /popular 1d(1d/1w/1m/1y) 获取1天(天/周/月/年)的popular图片
- /random 3 获取随机3张图片
- /tag bra 3 获取标签为bra的3张图片
- /help 帮助信息
- /about 关于
订阅channel

Telegram搜索@dailyYande或者点击这里dailyYande
使用@yande5_bot机器人管理@dailyYande channel,每晚20:00准时发送当日popular图片,每周21:00准时发送本周popular图片